Sunday 31 May 2009

the work continues

As I said in the last article, our goal for the 2 last week was to continue the main body upper part (the nose upper part), the back suspension and the chassis jig.
We did so.

The nose:

The approach was exactly the same we used for the main body bottom part. In fact, we started to make a good shape from the raw polystyrene foam. We put a fiberglass skin to make it solid. Then to make the sanding easier, a Epoxy skin is added (with a lot of Q-cells).
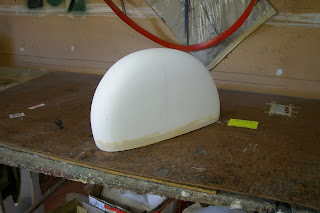
We sanded the body, added another layer of epoxy, sanded again the body and finalized the nose by filling the holes with some polyester. We also focused on the windscreen junction with the main body.


Windscreen junction


The last step was to paint the nose in grey to find the last tricky little holes. After a last fill in, we are now able to go through the final painting!


Grey painting


At the same time, we also worked on the windscreen. Using what we did on the main body, we were able to have a good idea of what the car will really looks like (using some additional wood slices and wooden rods).

Thanks to that, we made a first windscreen. Our goal was then to make the mold for the glass manufacturer. But we knew lots of modifications were up to be made. That is why we keep on fitting that windscreen with the main body.


Windscreen mold


Our last plan is to focus on the roof (by modeling it into raw foam) and to adapt the windscreen top. We will then be able to get a really nice top shape.

The rear suspension:

As I mentioned in my last article, we also wanted to finish the rear suspension.
After having design them during last month, we finally made it. That work called for some blue prints to cut the 2 aluminum pieces. Then we welded these pieces with some other ones to make the structure stronger and to be able to correctly settle the wheel on the suspension. Finally, we assemble the rear suspension. Nice, isn’t it?


Rear suspension


The jig:

During the last few days a flood came down on us. Because of that, we were forced to change our plan with the jig and make it really stronger (the timber jig became soaked with water and broke). That is why we started to build that in steel.


The new jig


As a result, we hope that the main body mold will be finish in the next few weeks. We will then be able to make the mode and to get the first main body!
At the same time, we keep on building the jig (in steel) and we are going to move on to the front suspension.

Sunday 17 May 2009

End of the main body buttom part

Two weeks has passed and we used this time to futher the car's main body.
The last step was to sand, to fill in holes with filler (Epoxy, polyester, etc.) and then sanding again and so on until we get the silk curved we wanted.

After that we painted the body with some special painting (a black painting) and sand one more time the body. With this black painting, we were able to see where the last holes were and to fill in them.
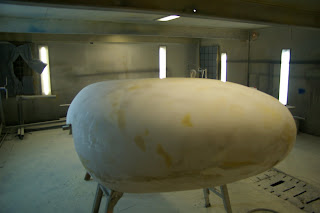
To conclude with this part, we painted the body with some ultra silk painting that is used to make a mold.


Last painting

Then the next step was to go on, and to focus on the up part of the nose. That is why we turned the body over and put it on some support we welded.


Main body support

To make the up nose accurately, we are first going to focus on the windscreen so as to get the correct curves. Then we will do the same king of work we did on the button part of the main body, and finish the mold for the mold.

We also designed and manufactured the first part of the suspension bars.


First suspension bar

We finished the spine. Because of our batteries choice, we are not sure to use it yet...


Spine welding

Next week, we will focus on the nose shaping and on the windscreen mold manufacturing. At the same time, work will continue on the suspension bars and on the steel jig manufacturing.

Friday 1 May 2009

Sanding sessions

The work goes on. Last week I was unable to post an article because of my broken camera.
Now let me continue to describe the work that has been done during these two weeks.

You may surely remember that we were focusing on the main body manufacturing, the chassis welding and, at the same time, the jig construction. This work has continued during the two last weeks.

Main body shaping:

With alex's back-up, we were able to further the shaping. As soon as we used polystyrene foam and plywood rods to build the main body skeleton, a lot of work has to be done in order to get smooth curves.
That is why we had long sanding sessions on the car using addition of fibreglass skins (to make the structure rigid) and epoxy and polyester fillers (to get the best curves).


A sanding session

The work was long but we got really good results. We still need to make another sanding step before making the main body mold.


Main body shape

In the same field, we were able to finish the wheel pants. We still have some decision to take about them (mainly about the design) but we may be able to build the mold quite soon.


Wheel pants shape

Chassis and jig manufacturing:

A lot of work has also been done around these two subjects.
First of all, every roll bar has been finished. We were also able to design and to build the car's rear and its jig.

The jig

As you will notice, the jig has also progressed and we started to build the spine jig.

The spine jig

Now, the chassis is in hold. Indeed, we have to wait the main body to be finished so we can use it to get the most accurate mesures. Thanks to that, we hope the chassis and the main body to match the best possible.

On the other hand, we still continued to design the direction and the front and the rear suspensions on our computers.

On next week planning, we will focus on the main body mold. We hope to get the final main body quite soon!
Then, the chassis...the suspension...the direction...and so on!